
Migrate Your Site to ROCON
Migrate your site to ROCON using one of three methods: from the Create Site page, the Site Migration page (via plugin or backups), or by requesting Expert Migration. Follow the steps below for a seamless migration.
Method 1: Migrate from the Create Site Page
- Navigate to the Create Site page.
- Select Migrate Site and click “Start Now.”

-
Provide the following details:
-
Current Hosting Provider: Specify your current host (e.g., Bluehost, SiteGround, GoDaddy) to help the migration team understand your site’s infrastructure.
-
Multi-Site Network: Indicate if your site is part of a WordPress Multi-site network, as this affects the migration process.
-
Important Directories: List any custom directories (e.g., media storage, logs, or backups) outside standard WordPress folders (e.g., wp-content, uploads) to ensure they are migrated.
-
WordPress Admin Credentials: Provide your Admin URL, Username, and Password.
-
-
Click Next to initiate site creation.
-
Once the site is created, the ROCON team will handle the migration.

Method 2: Migrate from the Site Migration Page
- Navigate to the Site Migration from the sidebar of your site that needs migration.

-
Choose one of the following options:
- Migrate Via Plugin (Migrate Guru)
- Migrate Via Backups
- Request Expert Migration

#
Migrate via Plugin (Migrate Guru) #
To migrate your current site to Rocon with Migrate Guru plugin, please follow below steps:
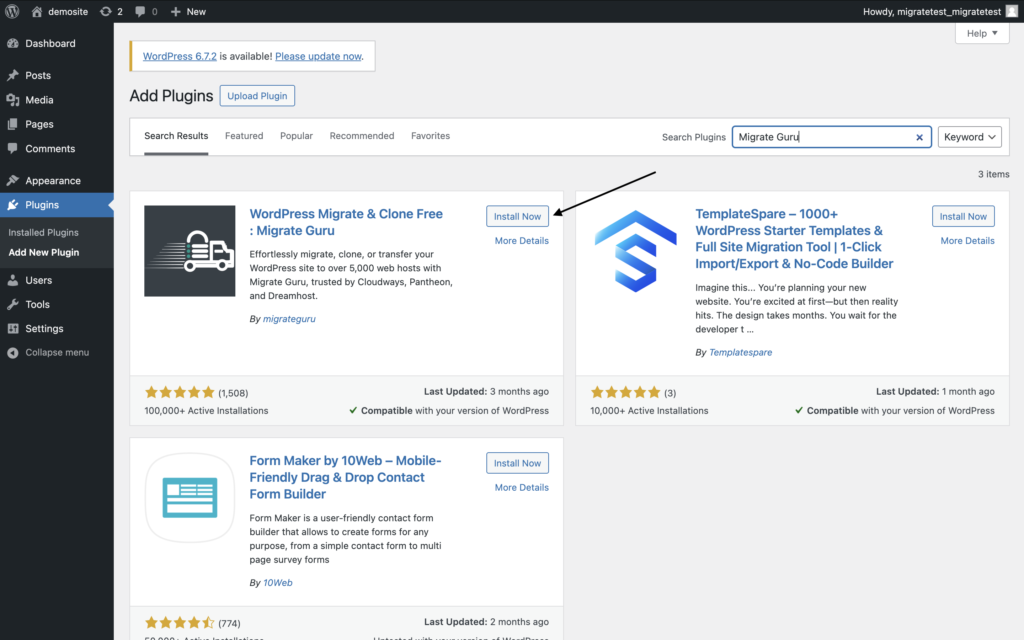
Step 1: Install Migrate Guru: #
-
-
Install and activate the Migrate Guru plugin on both your source (current WordPress site) and destination (ROCON-hosted site) WordPress installations.
-
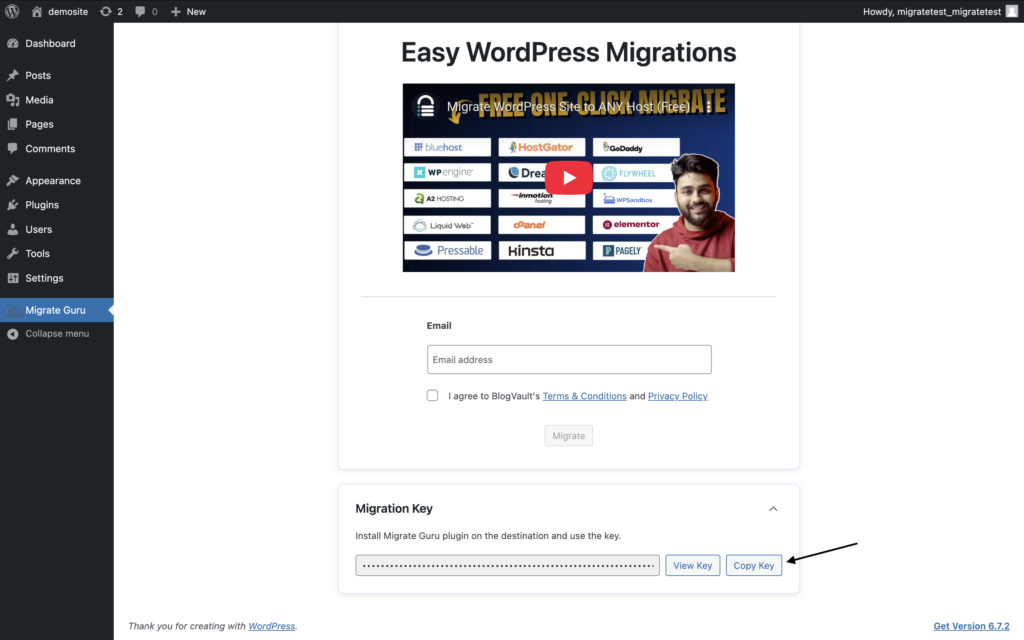
Step 2: Generate Migration Key: #
- On your ROCON site’s WordPress Admin Dashboard, go to Migrate Guru.
- Expand the Migration Key section and click Copy to save the key.
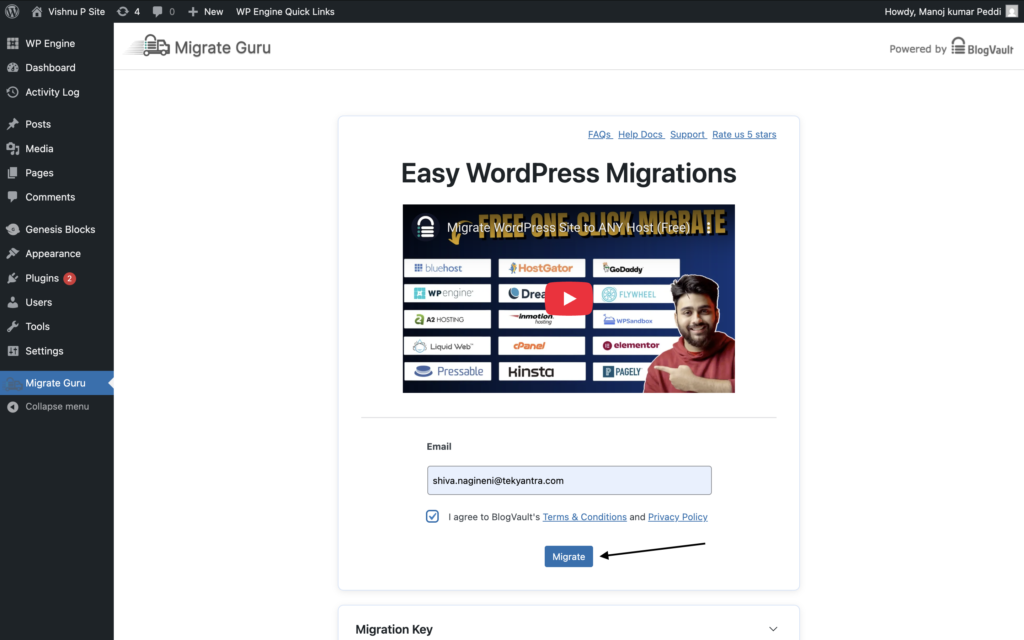
Step 3: Initiate Migration from Source Site: #
-
-
On your source site’s Admin Dashboard, go to Migrate Guru.
-
Enter your email address, agree to the terms, and click Migrate.
-
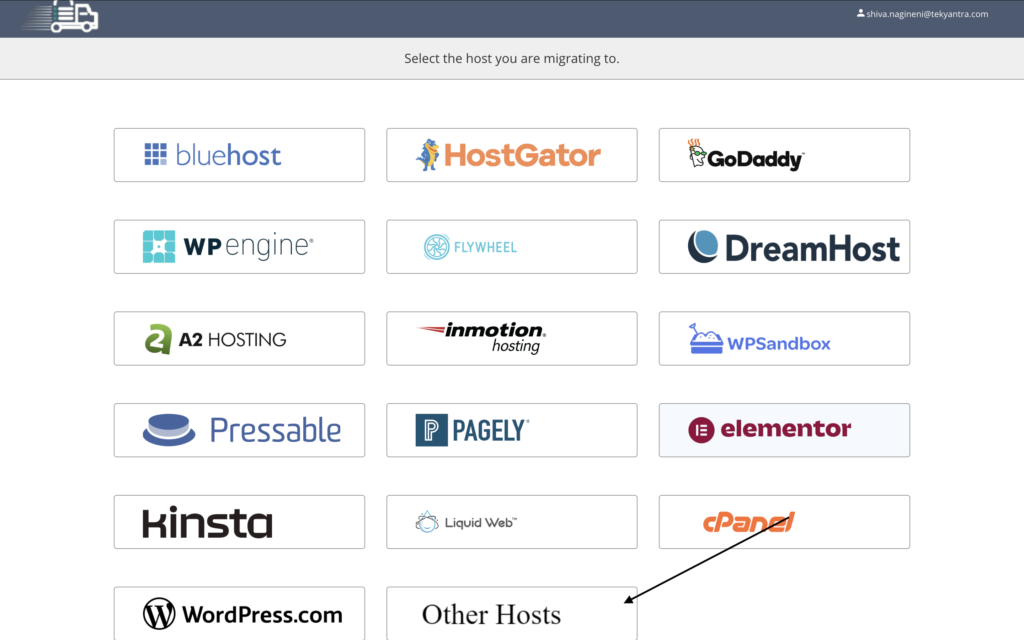
Step 4: Choose Hosting Type #
-
Select Other Hosts for a custom migration setup.
Step 5: Select Migration Method: #
-
-
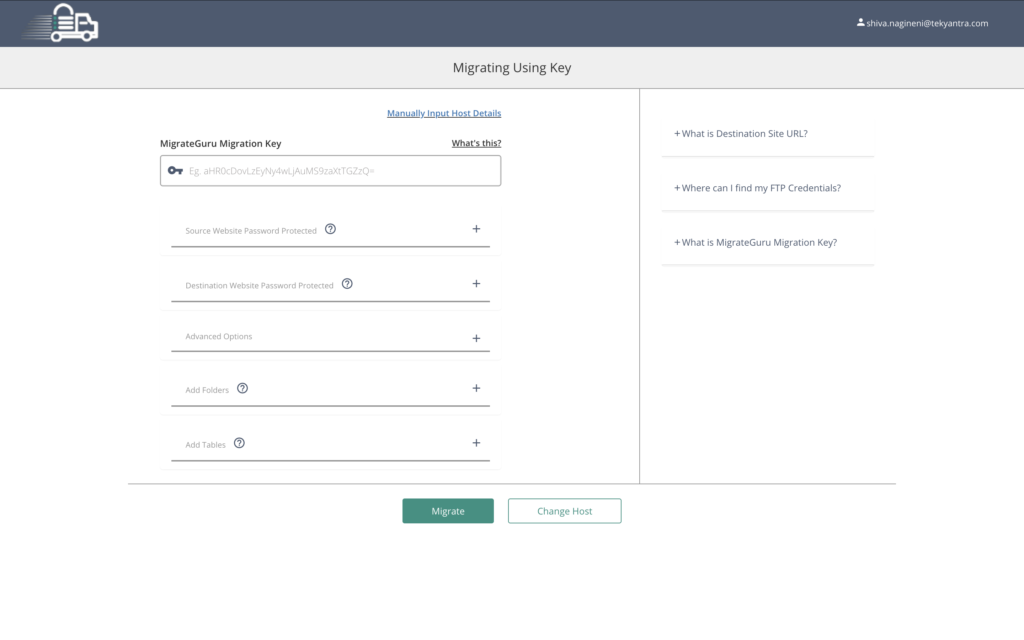
Using Migration Key:
-
Paste the copied Migration Key from your ROCON site.
-
Enter credentials for both source and destination sites as prompted.
-
Click Migrate to start the process.
-
-
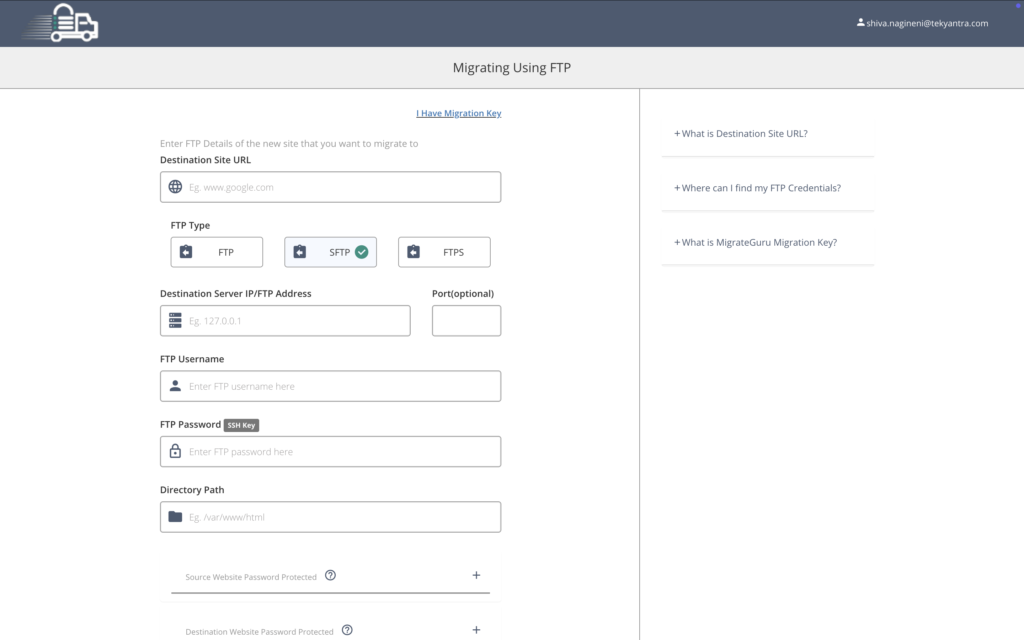
- Using SFTP Credentials:
-
-
-
Click Manually Input Host Details.
-
Provide the following for the ROCON site:
-
Site URL
-
IP Address
-
FTP Username
-
FTP Password
-
Directory Path
-
-
Click Migrate to begin.
-
-
- Migrate Guru will handle data transfer and configuration syncing automatically.
Migrate via Backups #
If you want to migrate your site manually via backups please follow below steps:
Step 1: Export Database from Current Host:
-
-
Log in to your current host’s cPanel and open phpMyAdmin.
-
Select your site’s database, click Export, and choose Custom under Export Method.
-
Select all tables, ensure Object creation options are checked, and click Go to download the database file.

-
Step 2: Download WP-Content fiolder
-
Access your current host via their portal or FTP client.
-
Download the wp-content folder to your computer.
Step 3: Import database to Rocon
- Access your environment’s phpMyAdmin and click on the database on the far left titled as your sitename
- Halfway down the page, select Check All and Drop from the dropdown menu. Select Yes to confirm.

- Once this completes, click the Import tab at the top and select Choose File/Browse. Select the database file you would like to import and click Go at the bottom of the page.

- Once you have successfully imported your database, check your table prefixes. If they do not start with “wp_”.

- In wp_options table, make sure you edit option_value of siteurl and home to your temporary domain . as we are migrating your site to a temp domain in Rocon.

Step 4: Import your wp-content.zip files to Rocon
- Before migrating, make sure that your current site’s WP version is aligned with the one you created in Rocon to avoid incompatibility issues. It is suggested to update your WP version if it is outdated since new sites created in Rocon use the latest stable version. In case of any issues, you can contact support.
- You can use one of the following methods to import your wp-content file.
- Before migrating make sure. that your current sites wp-version is aligned with that of the site you have created in rocon to avoid incompatability issues. it is suggested to update your wp version if its not updated. since new site created in rocon are in the latest stable version. in case of any issues you can contact support .
- Navigate to the public_html directory.
- Upload the wp-content folder you downloaded from your current host.
Step 5: Go Live!
Once your site is live on the temporary domain and you have tested the functionality, you can point your main domain. Head to Point Your Domain for detailed information on how to go live. In case of any issues faced in earlier steps, you can reach out to support.
Note: This step isn’t relevant if you do not have a custom domain. #
Request Expert Migration
Follow below steps to Request an Expert Migration:
- Enter the required migration details:
- Your current hosting provider.
- Any important directories that need to be migrated.
-
Your Current Hosting Provider
- Specify the hosting provider where your site is currently hosted (e.g., Bluehost, SiteGround, GoDaddy, etc.).
- This helps the migration team understand your site’s infrastructure and access requirements.
-
Any Important Directories That Need to Be Migrated
- Some sites store essential files outside the standard WordPress directories (
wp-content,uploads, etc.). - If your site has custom directories (e.g., additional media storage, logs, or backup folders), specify them to ensure they are included in the migration.
- Some sites store essential files outside the standard WordPress directories (
- Provide your WordPress Admin URL, Username, and Password.
- Once the form is submitted our team will initiate the migration process.


