Migrate your existing site into Rocon #
Seamlessly migrate your site with us in few simple steps #
To migrate your existing WordPress site into Rocon you can follow these simple steps mentioned below.
- Have a backup of your existing site’s File system and Database.
- Migrating your site’s File system with Rocon
- Migrating you site’s Database into Rocon
Take a backup of your existing site: #
Before you start the migration process, it’s crucial to create a backup of your current WordPress site’s files and database. This ensures that you have a copy of all your content, themes, plugins, and settings. In case anything goes wrong during the migration, you can restore your site from the backup.
Migrating Your Site’s File System with Rocon: #
The file system of your WordPress site includes all the necessary files such as themes, plugins, images, and other media uploads. To migrate your file system to Rocon, you need to upload these files to your new Rocon hosting account using the provided file explorer or an SFTP client.
- Upload your file system using inbuilt File Explorer:
To upload your existing site’s file system into Rocon using the inbuilt File Explorer, follow these steps: First, open your site’s file explorer from the application.
Click on “Upload,” which will open a popup. In the popup, you can either select or drag and drop your files or folders directly.Once you’ve selected the files or folders, click on “Upload.” This action will start uploading all your selected files or folders to your WordPress site. After the upload is completed, check your themes, plugins, and content by visiting your WordPress Admin panel.
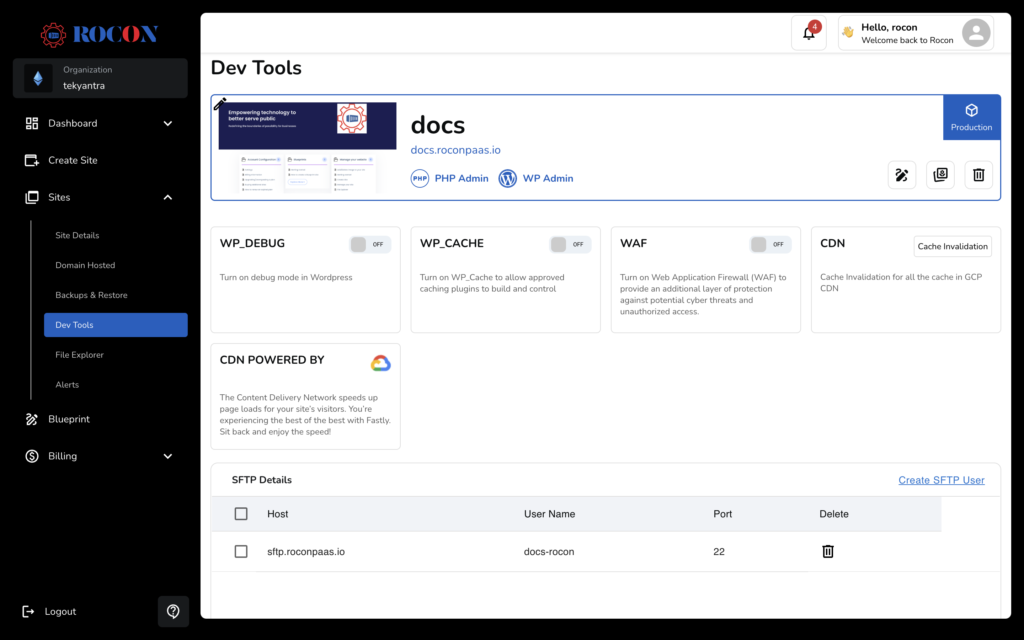
- Upload your file system using SFTP:To upload your existing site’s file system using SFTP, open your site from and go to the “Dev tools” tab. Click on “Create SFTP user” if you don’t have any users. If you have an existing SFTP user, you can use those credentials.

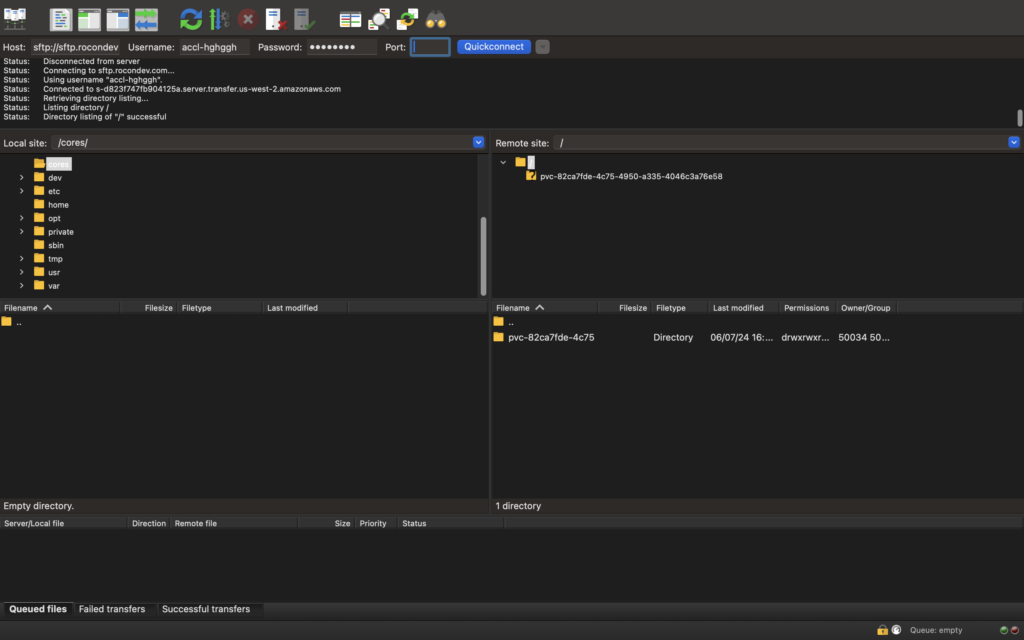
Open any of your favorite FTP clients; for this example, we’re using FileZilla. In FileZilla, enter your Host, Username, Password, and Port. Click on “Connect” to start the connection to your WordPress site. Once the connection is successfully established, expand the folder structure to navigate and upload your files.
Drag and drop your files/folders, once you drop them in your desired folder it will be uploaded automatically. The upload time is depended onn your file size.|
Migrating your existing site’s Database: #
- The database contains all your WordPress posts, pages, comments, and settings. To migrate your existing site’s database, export your site’s data from your existing database.
- Click on “PHP Admin”, this will open “phpMyAdmin” in a new page. Log in to your database with your site’s credentials. Drop all the tables except
wp_optionsandwp_usersas you will need these tables for updating your site URLs and more. Finally, click on “Import,” select your file, and click on “Import” to upload your site’s data.
Modify your wp_options and wp_users table in your site’s Database: #
- In the “wp_options” table, update the “option_value” for “siteurl” and “home” to reflect your previous site’s URLs. This ensures that your site will continue to function correctly with the new URLs.Note: The credentials shown in the picture are strcitly for example only.

In the “wp_users” table, modify the “user_login”, “user_password”, and “user_url” fields to match the values from your previous site. This step is crucial to maintaining the integrity of your user accounts and their login credentials.Note: The credentials shown in the picture are strcitly for example only.
- By following these modifications, you’ll ensure that your site’s database is correctly configured with your previous site’s information, facilitating a smooth transition.


