
Plan Selection
Choose Your Plan
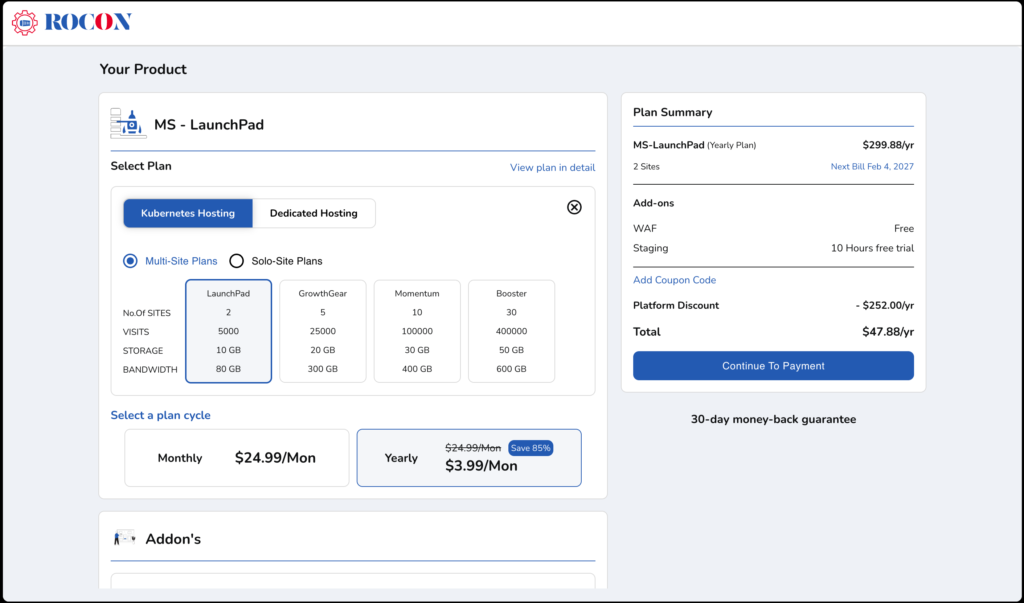
View the plan you selected from the marketing site. To change your plan, click Explore More Plans and choose between kubernetes or dedicated hosting:
- Solo-Site: Ideal for managing a single site.
- Multi-Site: Perfect for managing multiple sites under one account, offering greater flexibility and scalability.
Add-Ons
The following add-ons are included for free:
- Web Application Firewall (WAF): Enhances site security by protecting against potential threats.
- 10 Hours of Free Credit: Use in your staging environment for testing and development at no extra cost.

Billing and Payment
- Select your preferred billing cycle: Yearly or Monthly.
- Click Continue to Payment to proceed to the payment portal.
- Upon successful payment, your account will be credited with the selected plan and activated.


